Driven.Media Headlight Sidemarker Overlay - 2023+ Toyota GR Corolla
Expertly crafted with air release technology for effortless installation, these Dark Smoke/Light Smoke Tinted Headlight Sidemarker Overlays are proudly made in the USA and sold as a set.
Optional Add-Ons
Driven.Media Headlight Sidemarker Overlay - 2023+ Toyota GR Corolla
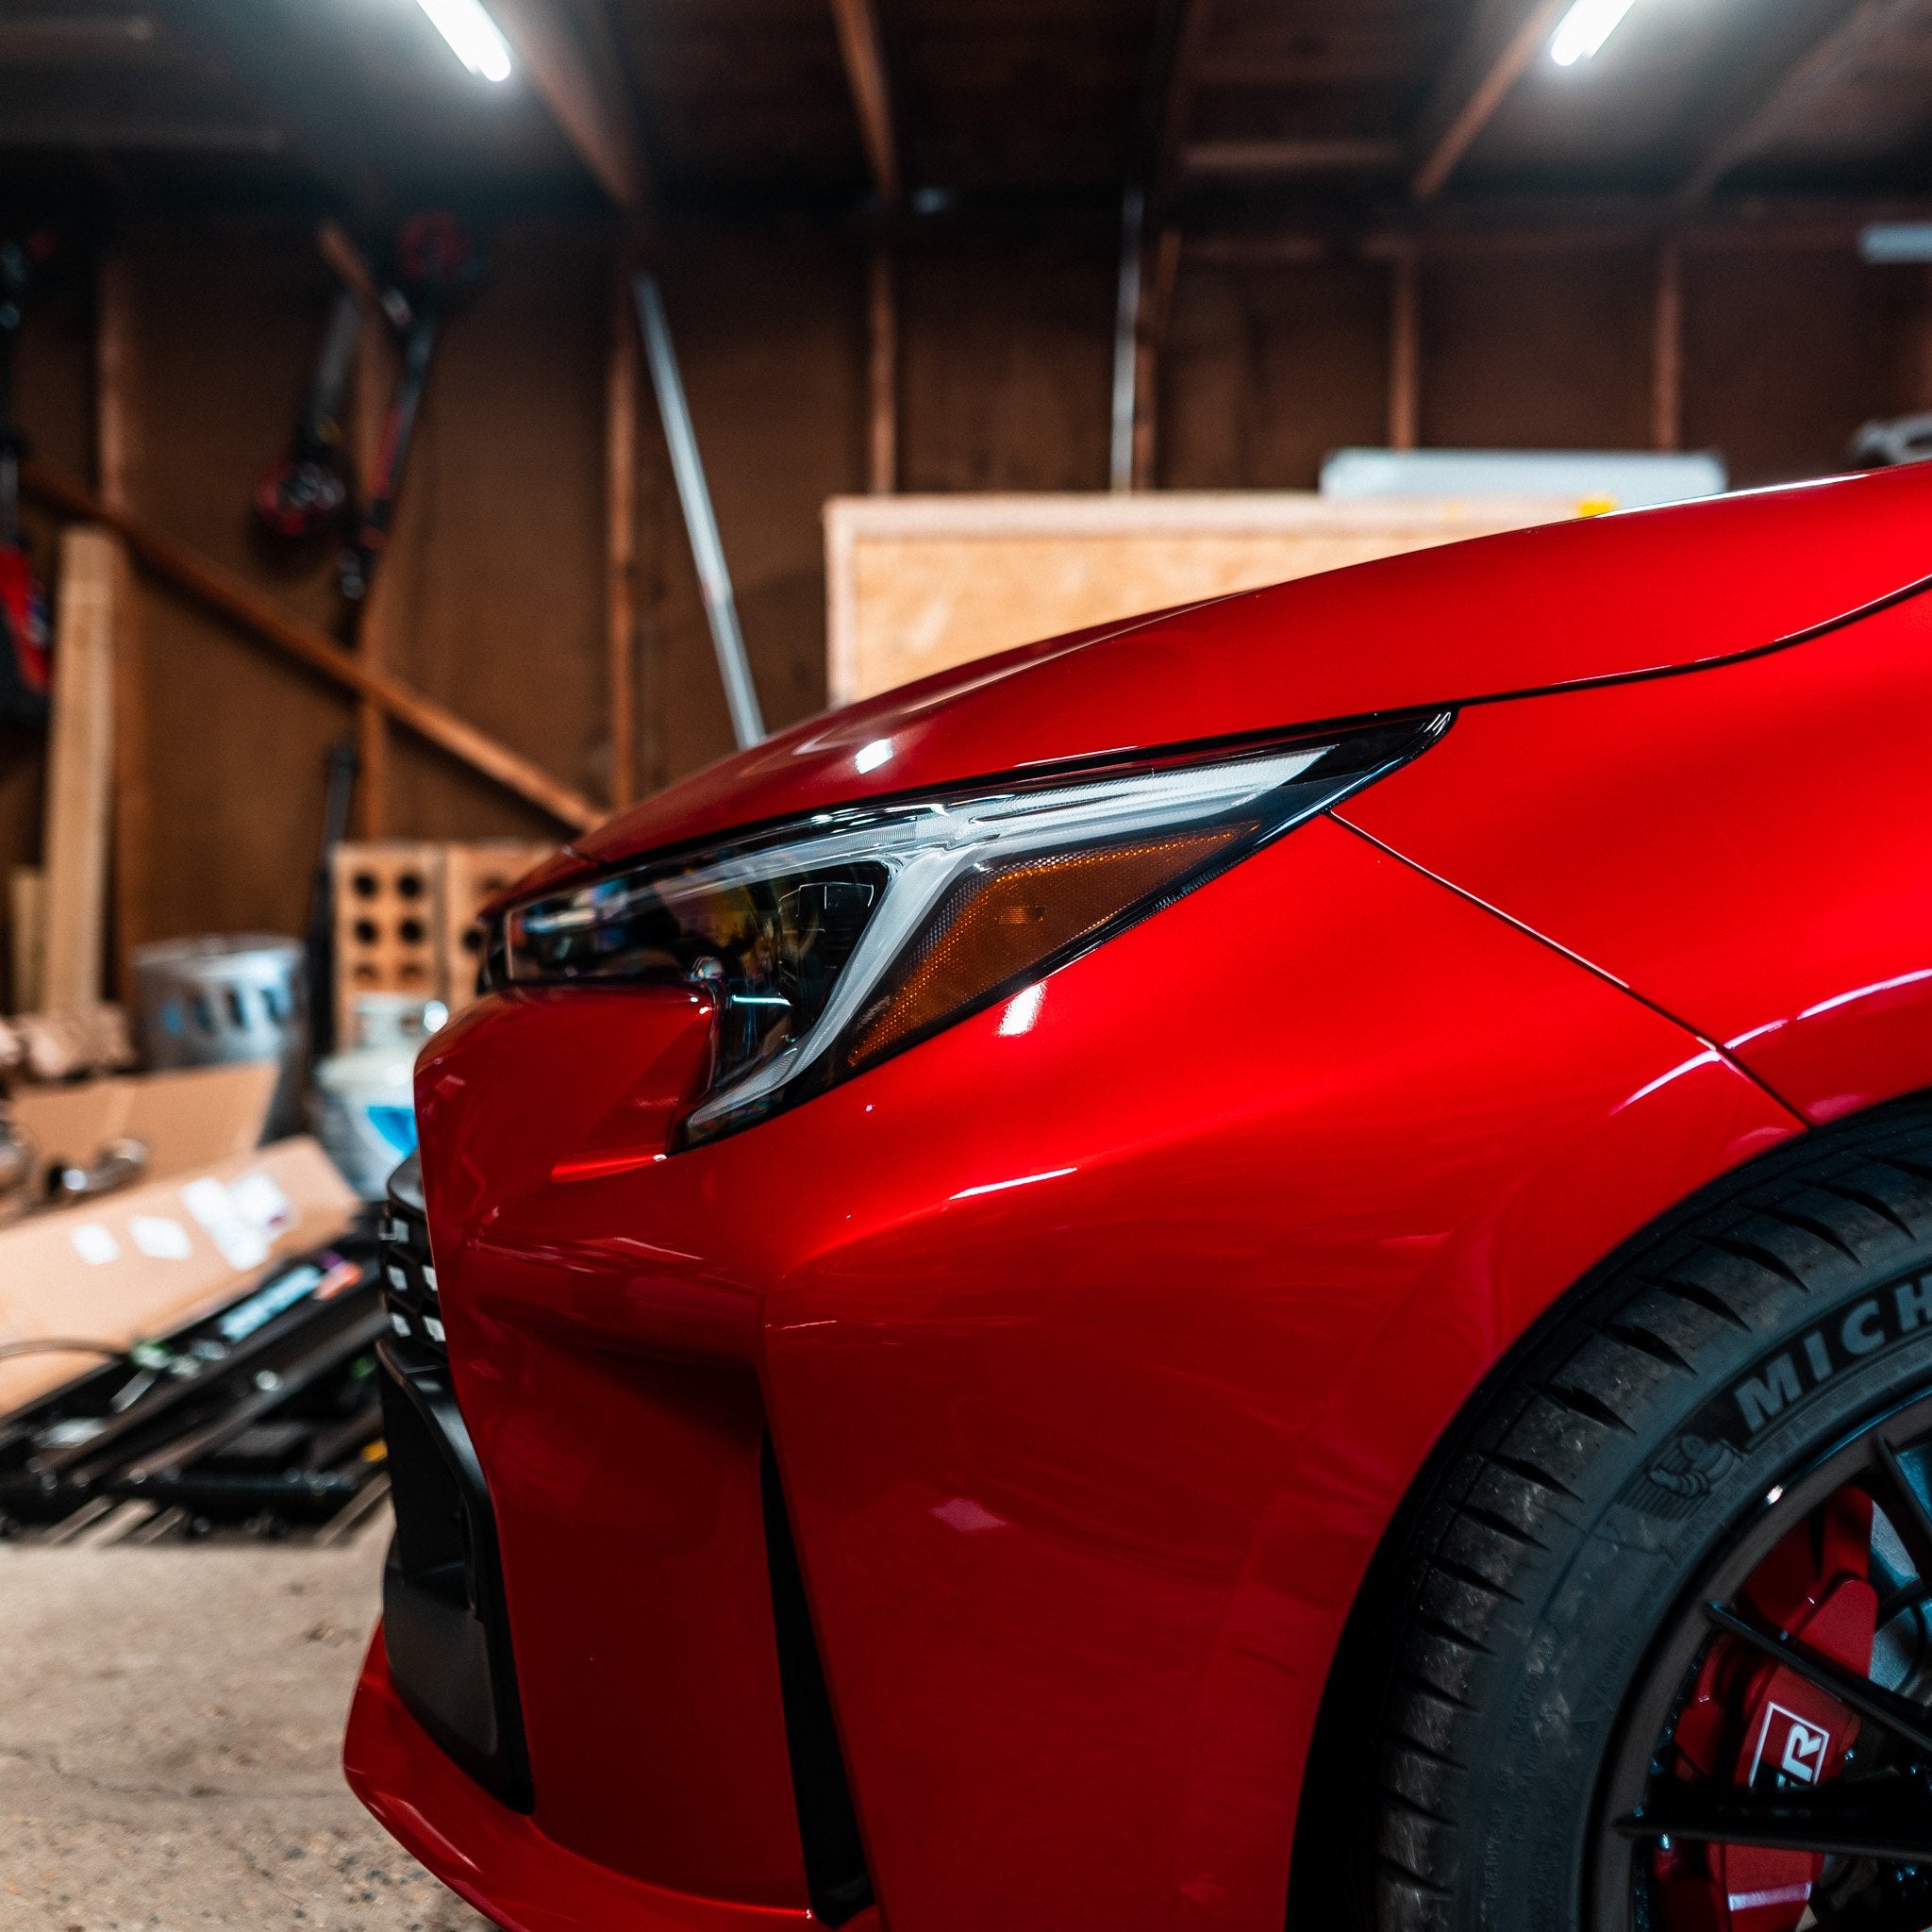
23+ GR Corolla Driven.Media Headlight Sidemarker Overlay
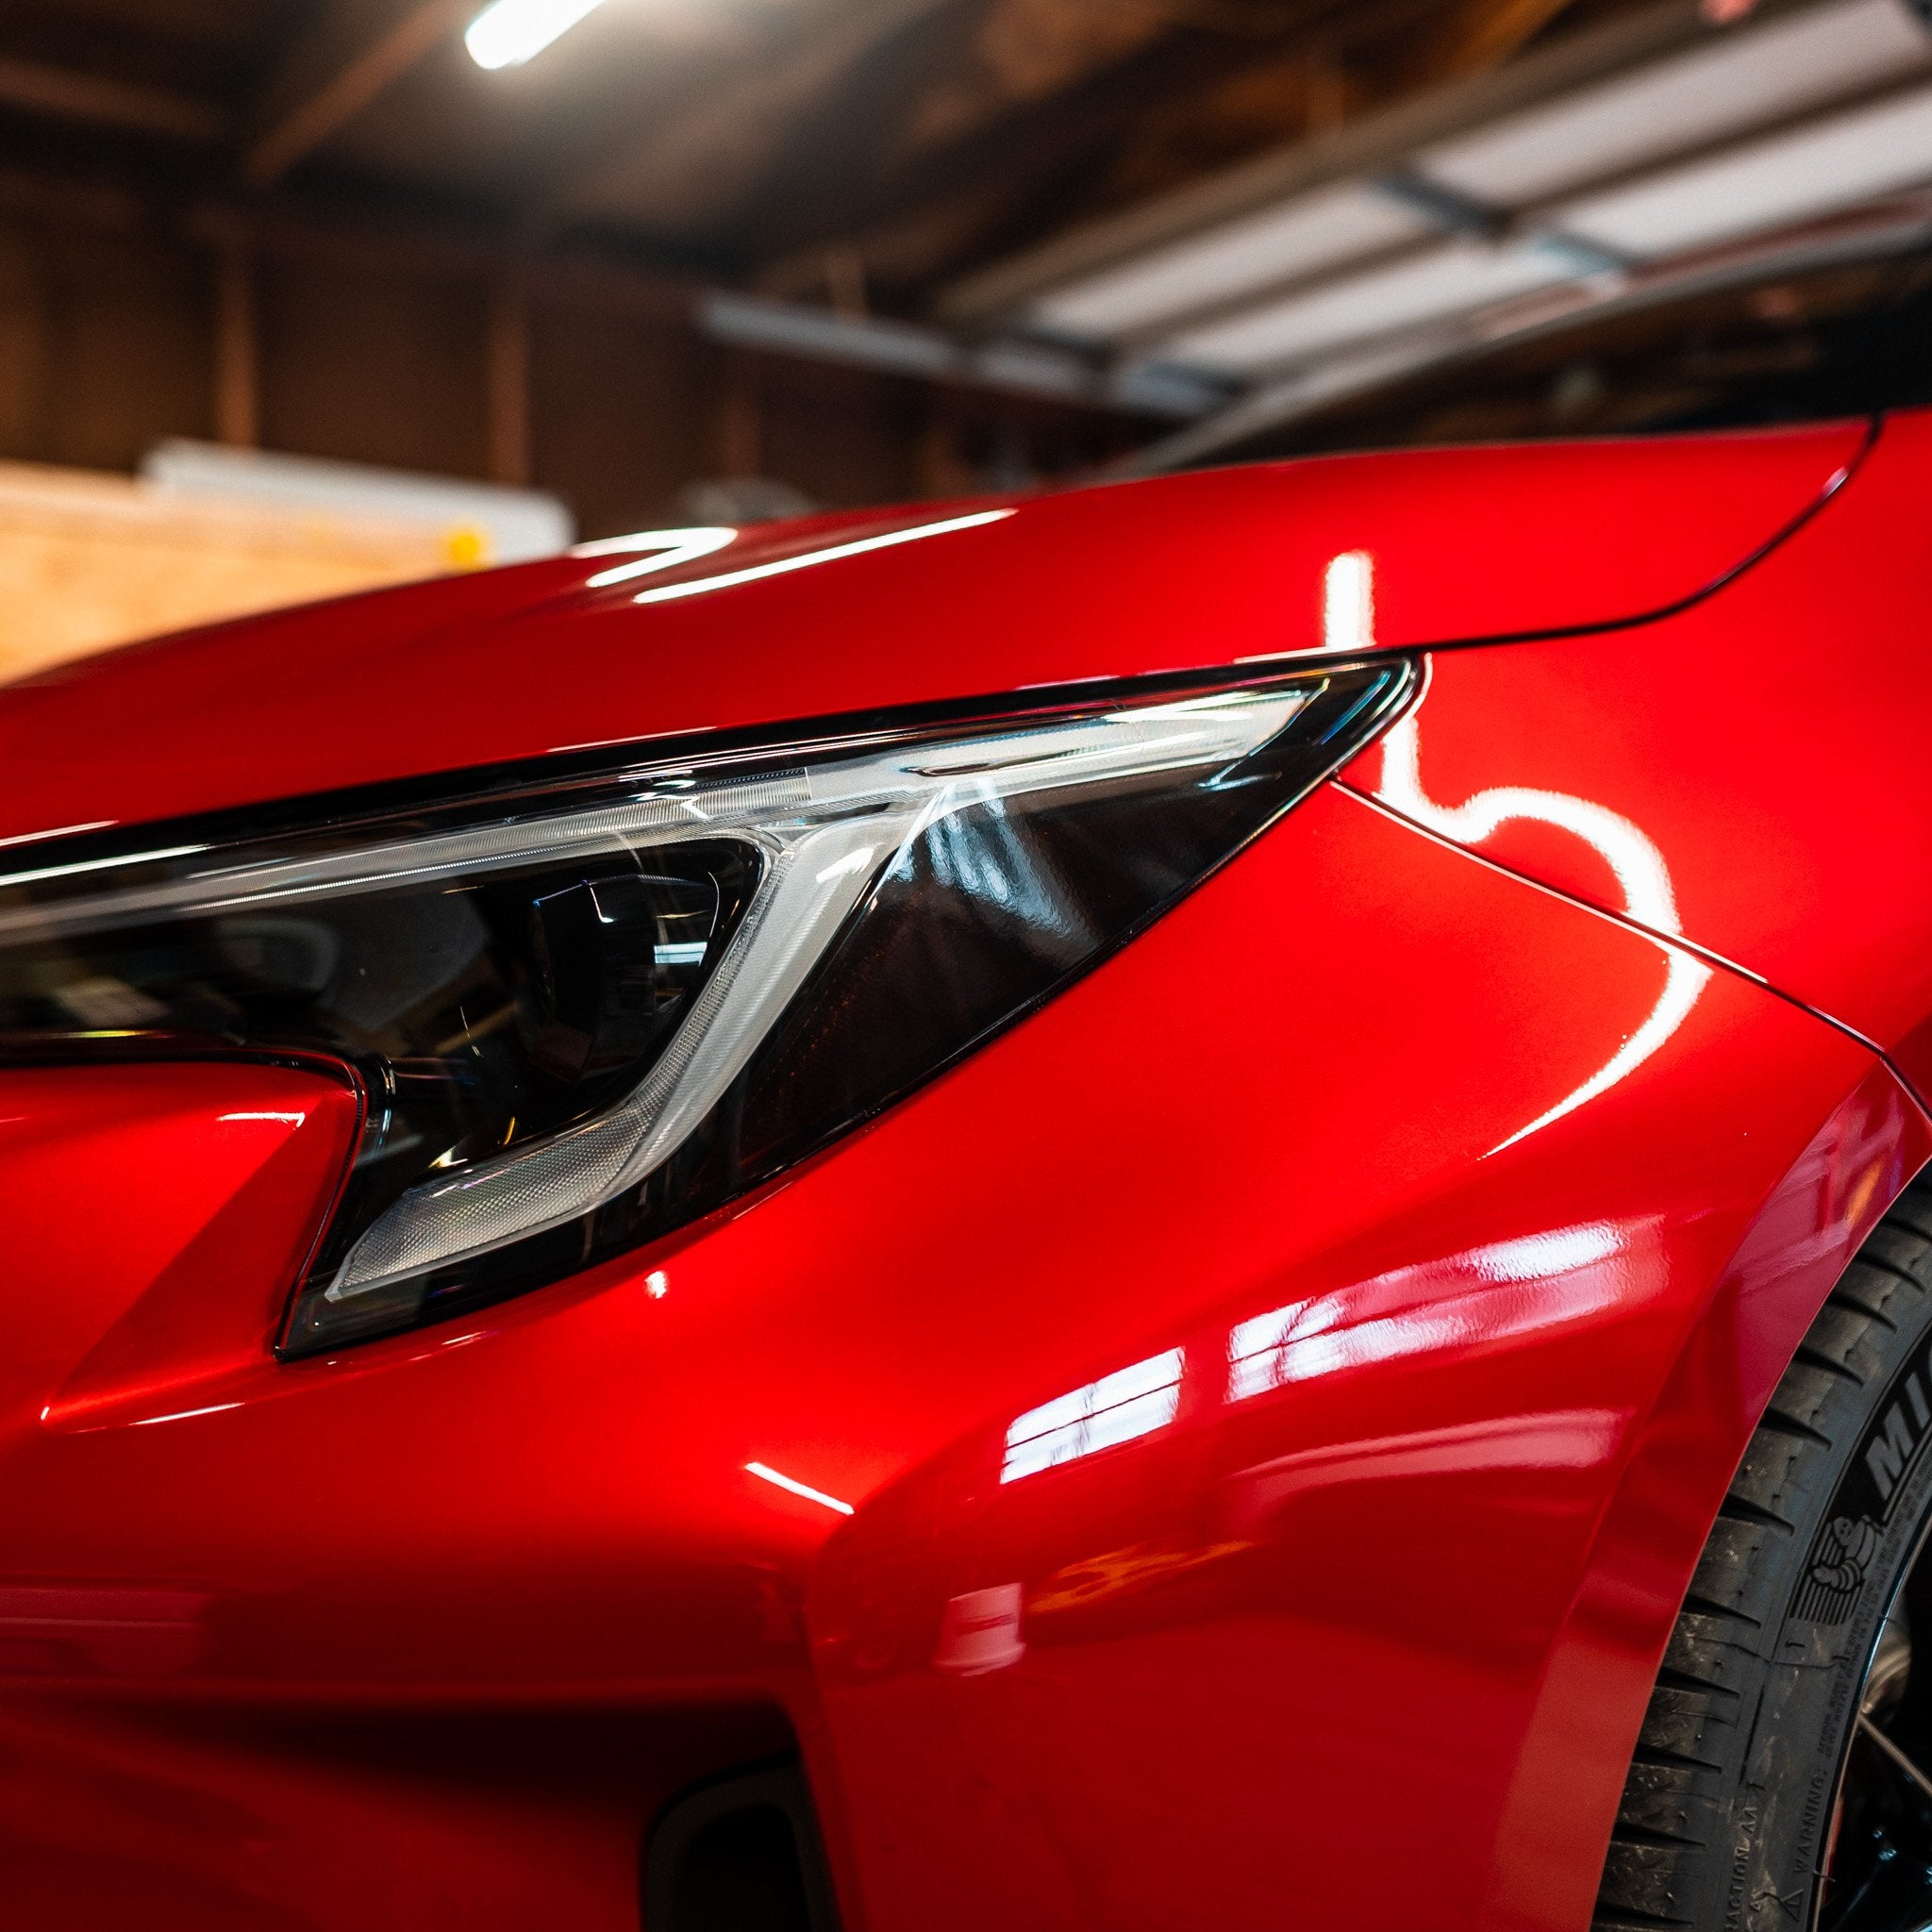
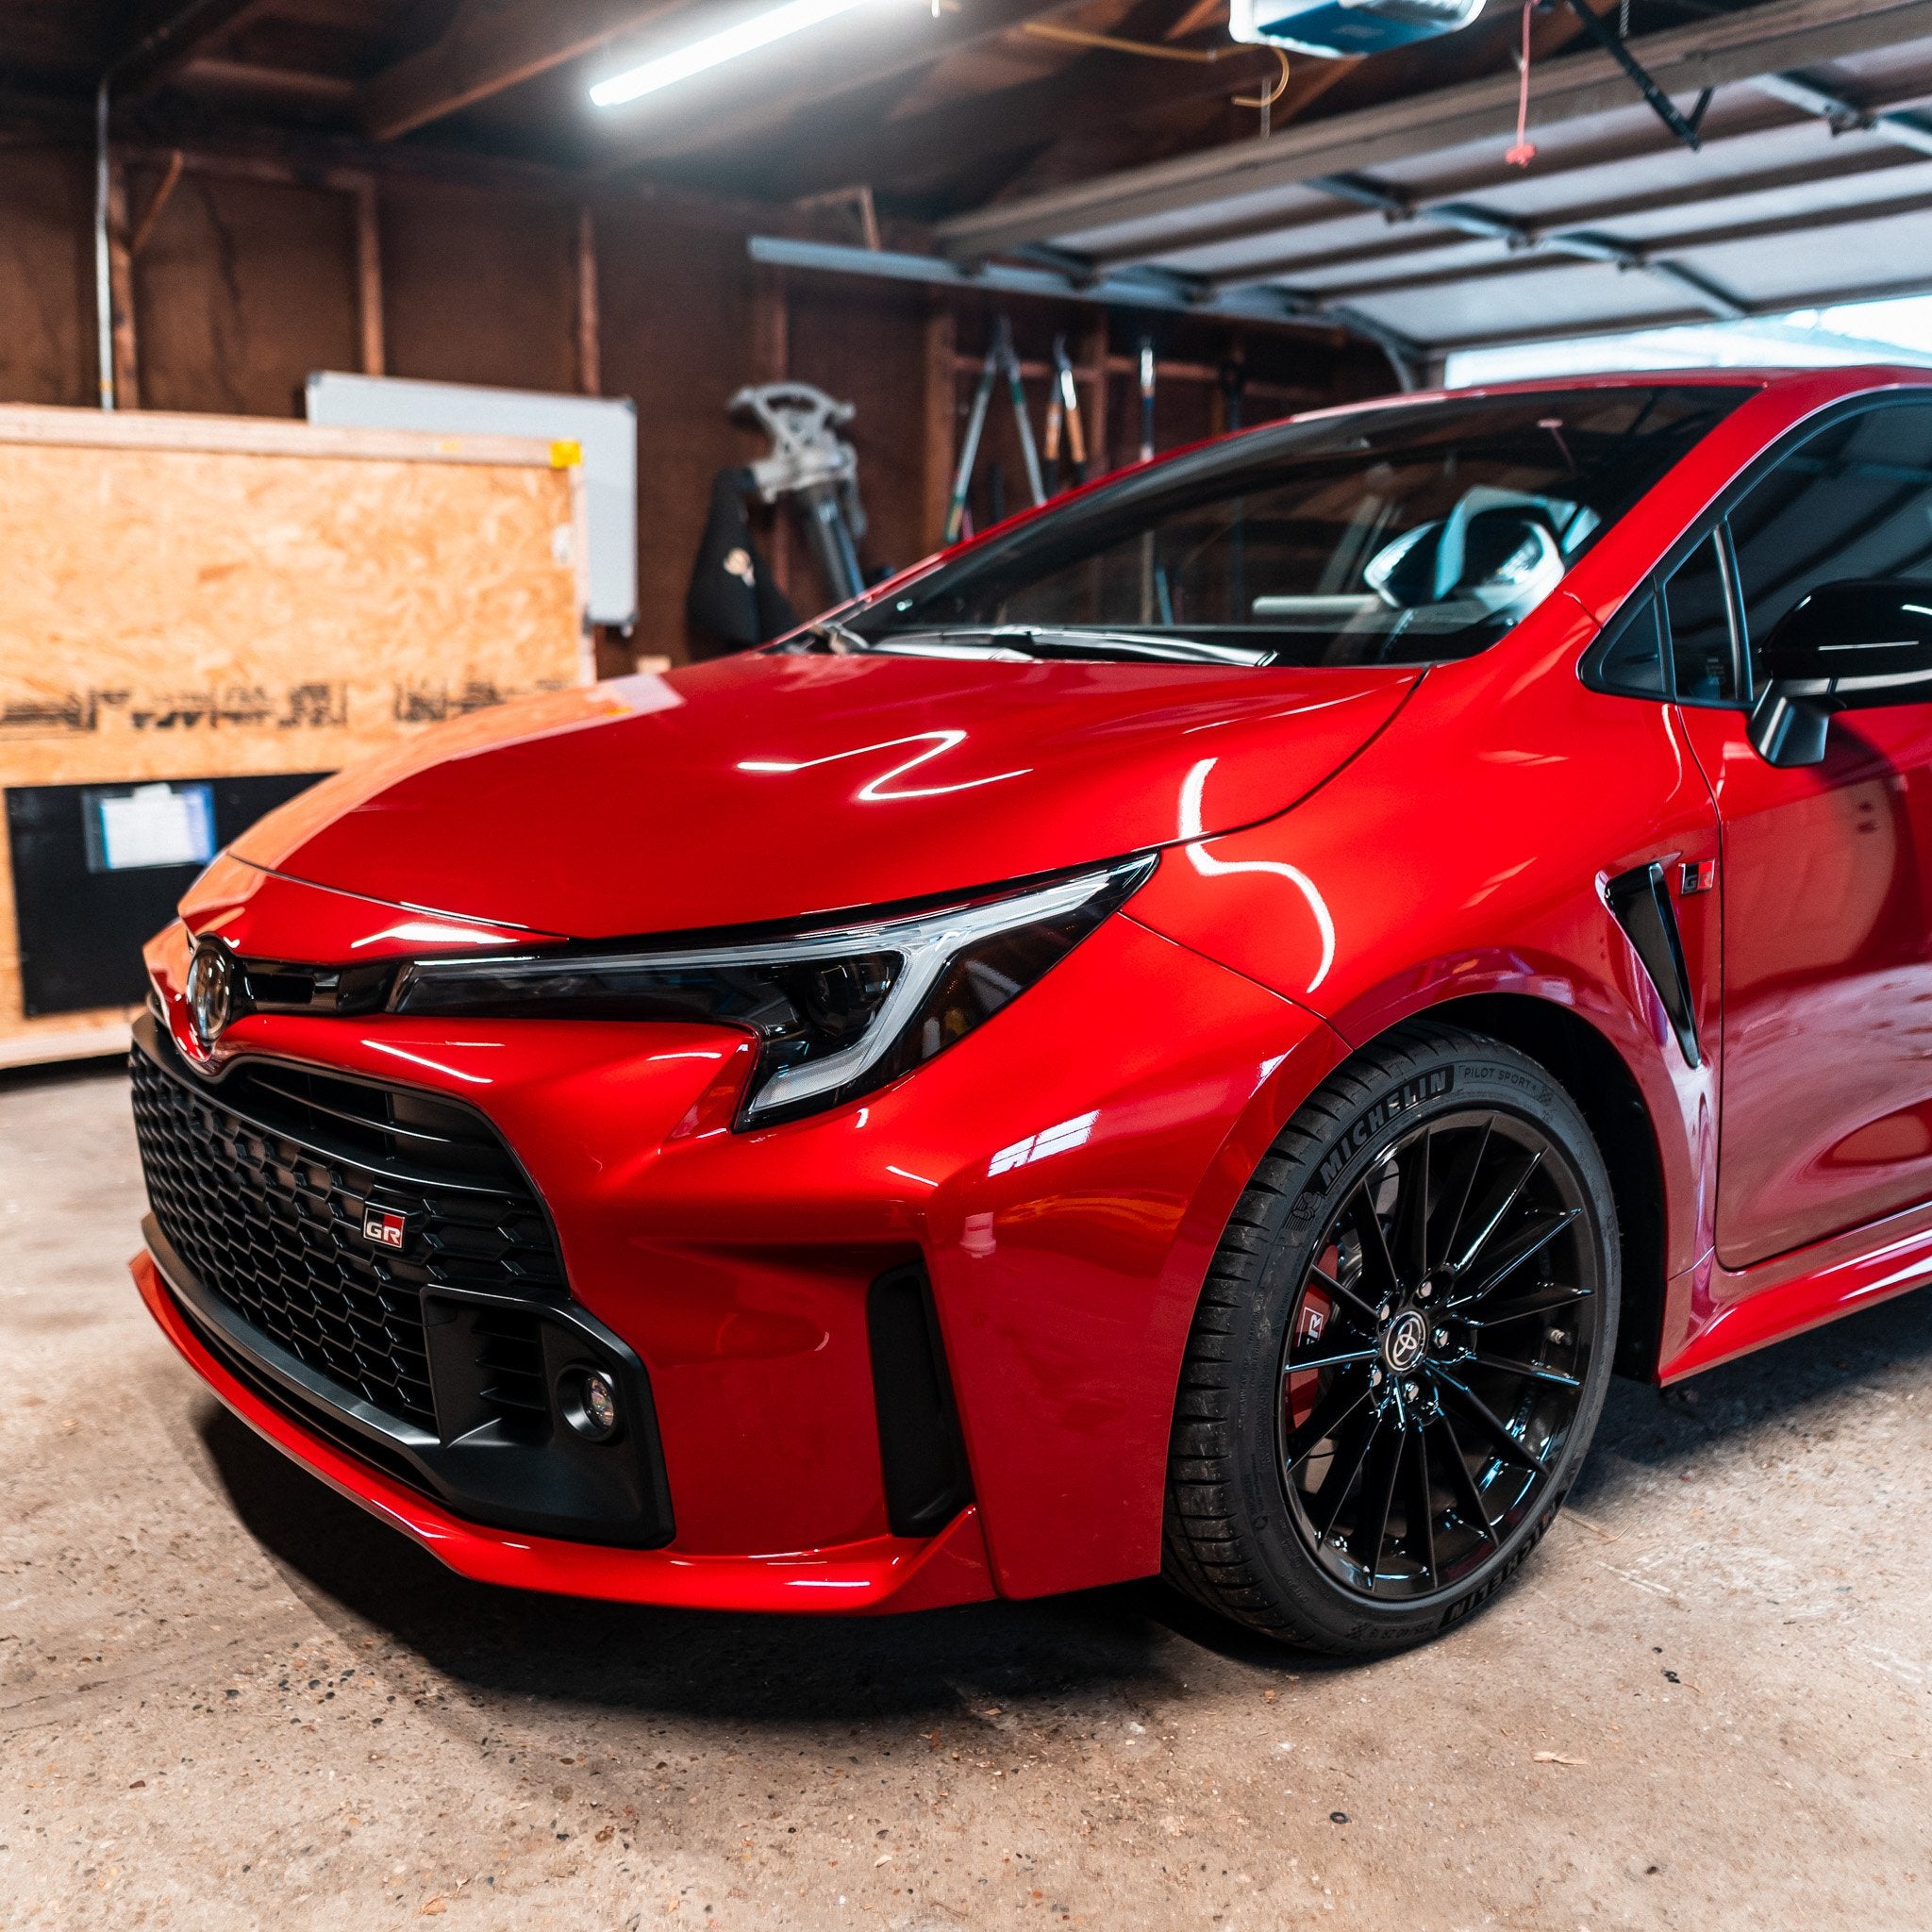
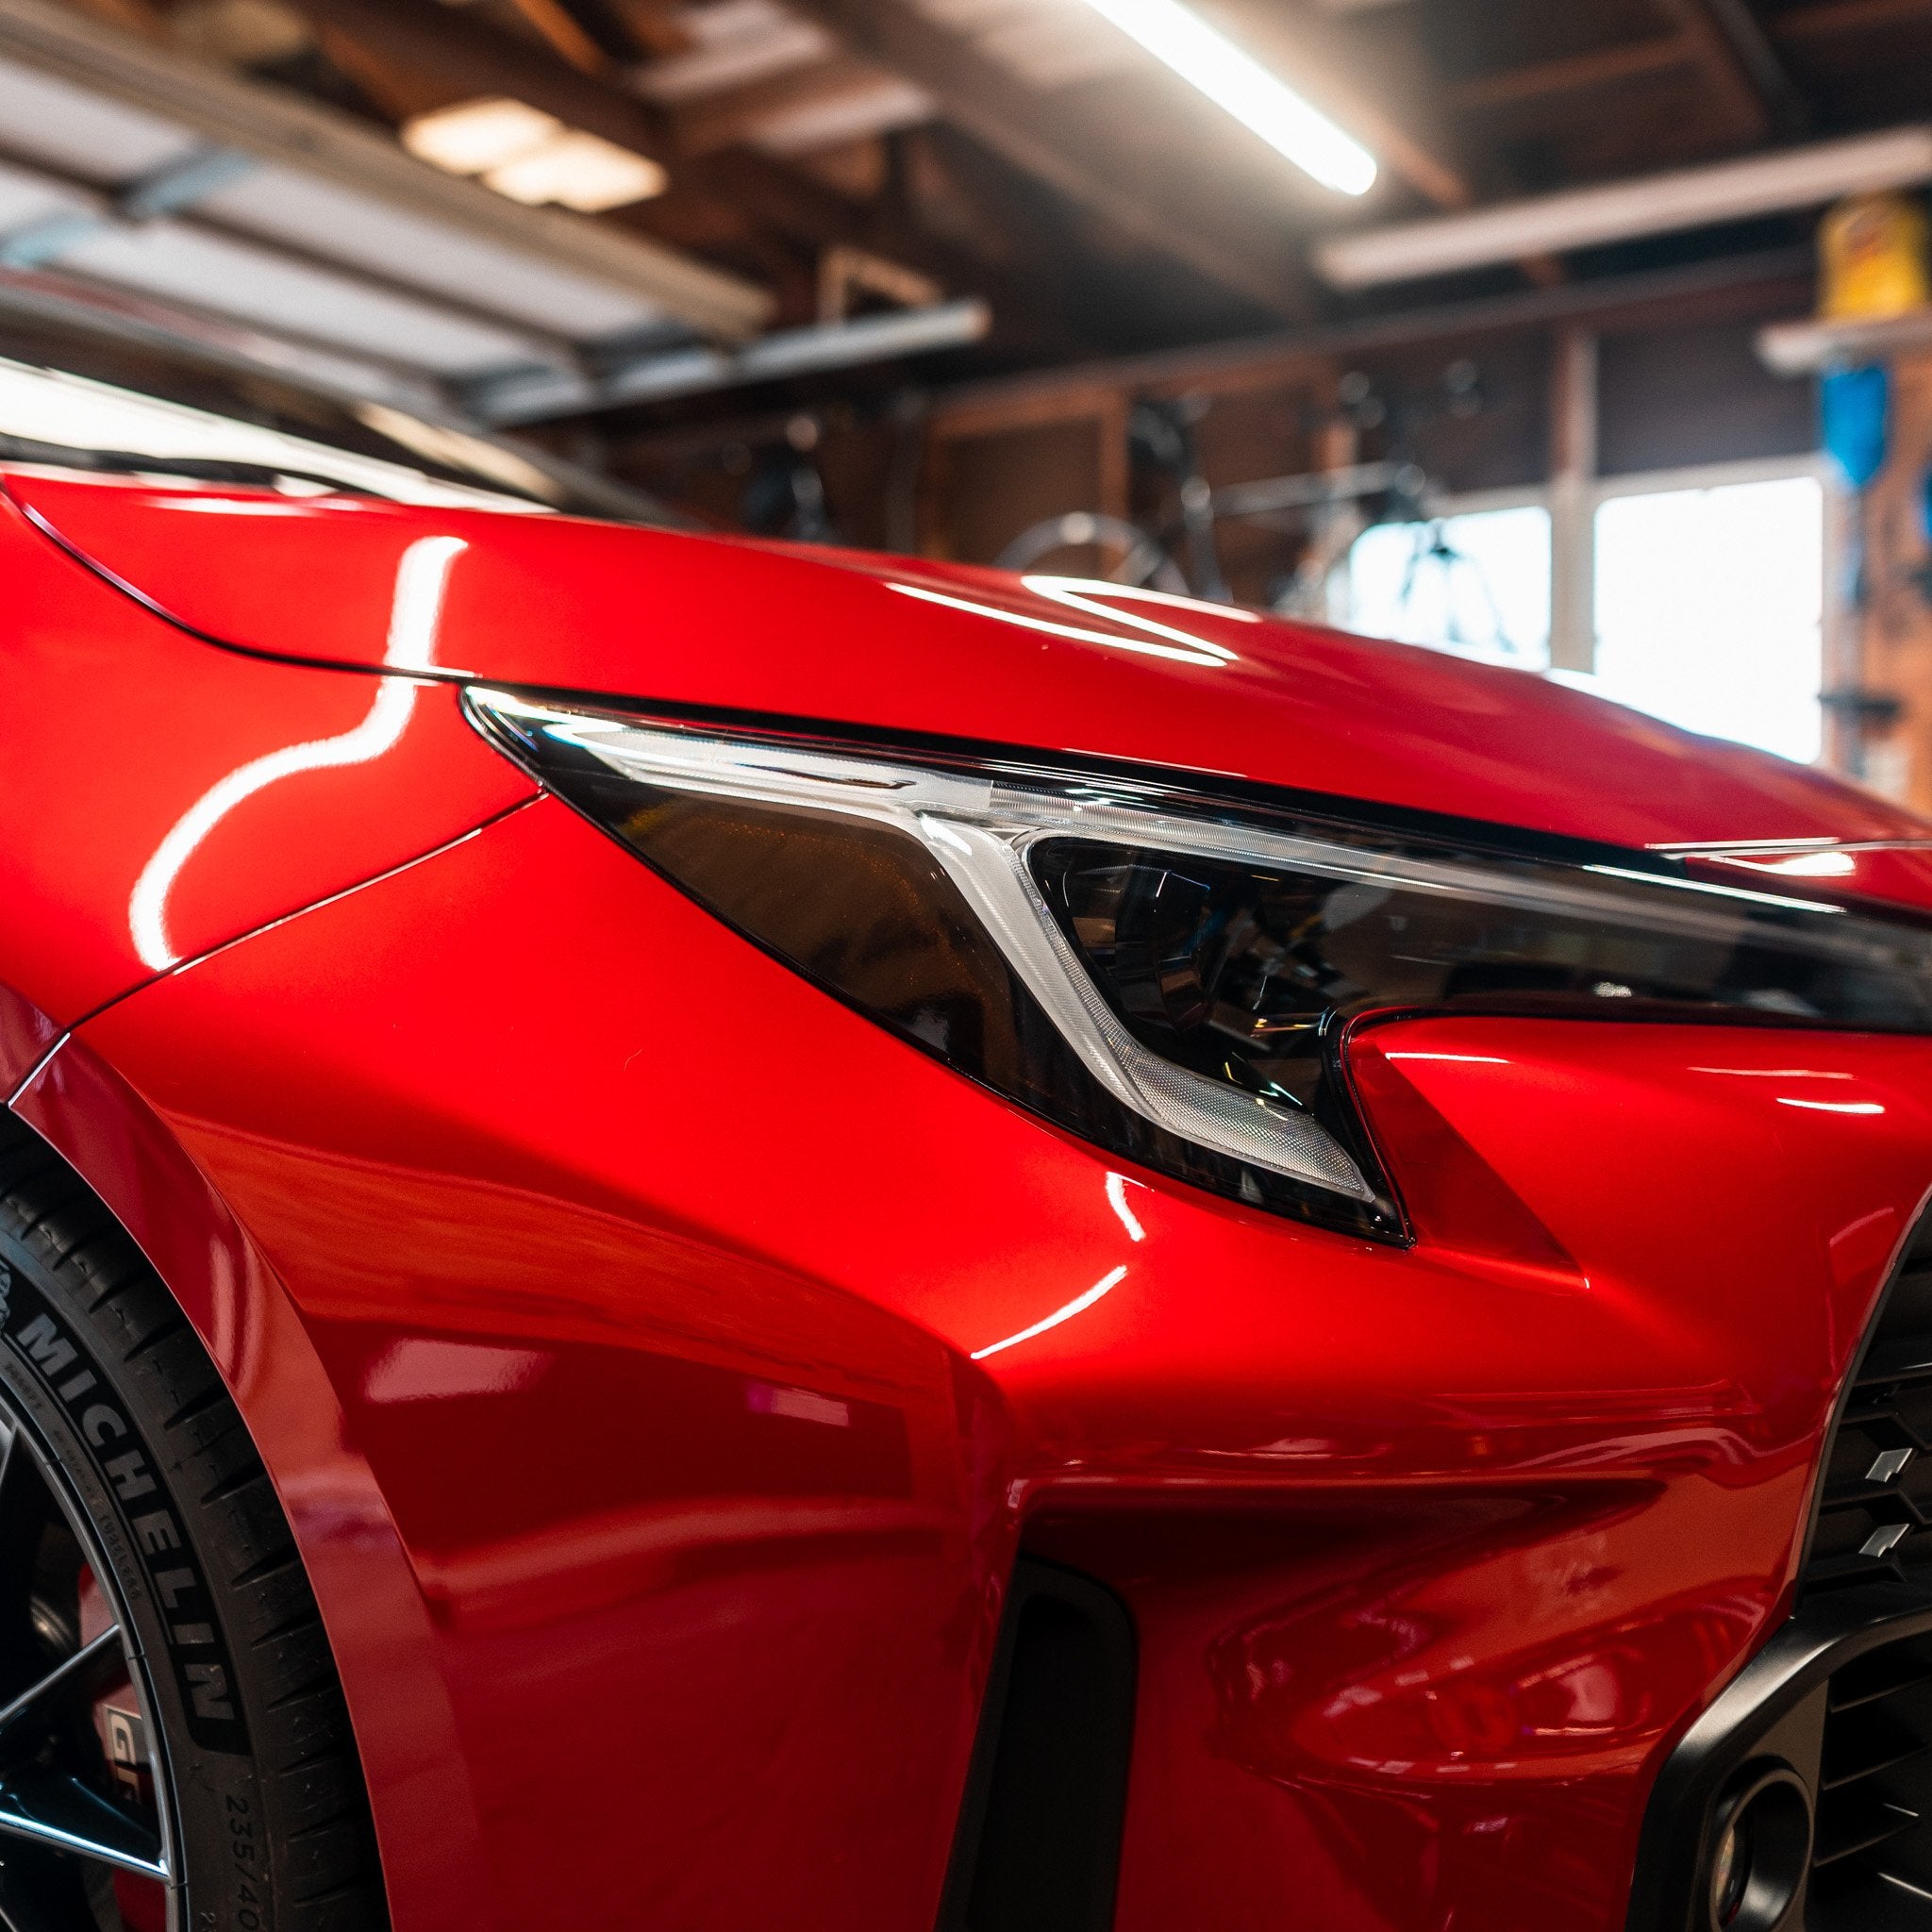
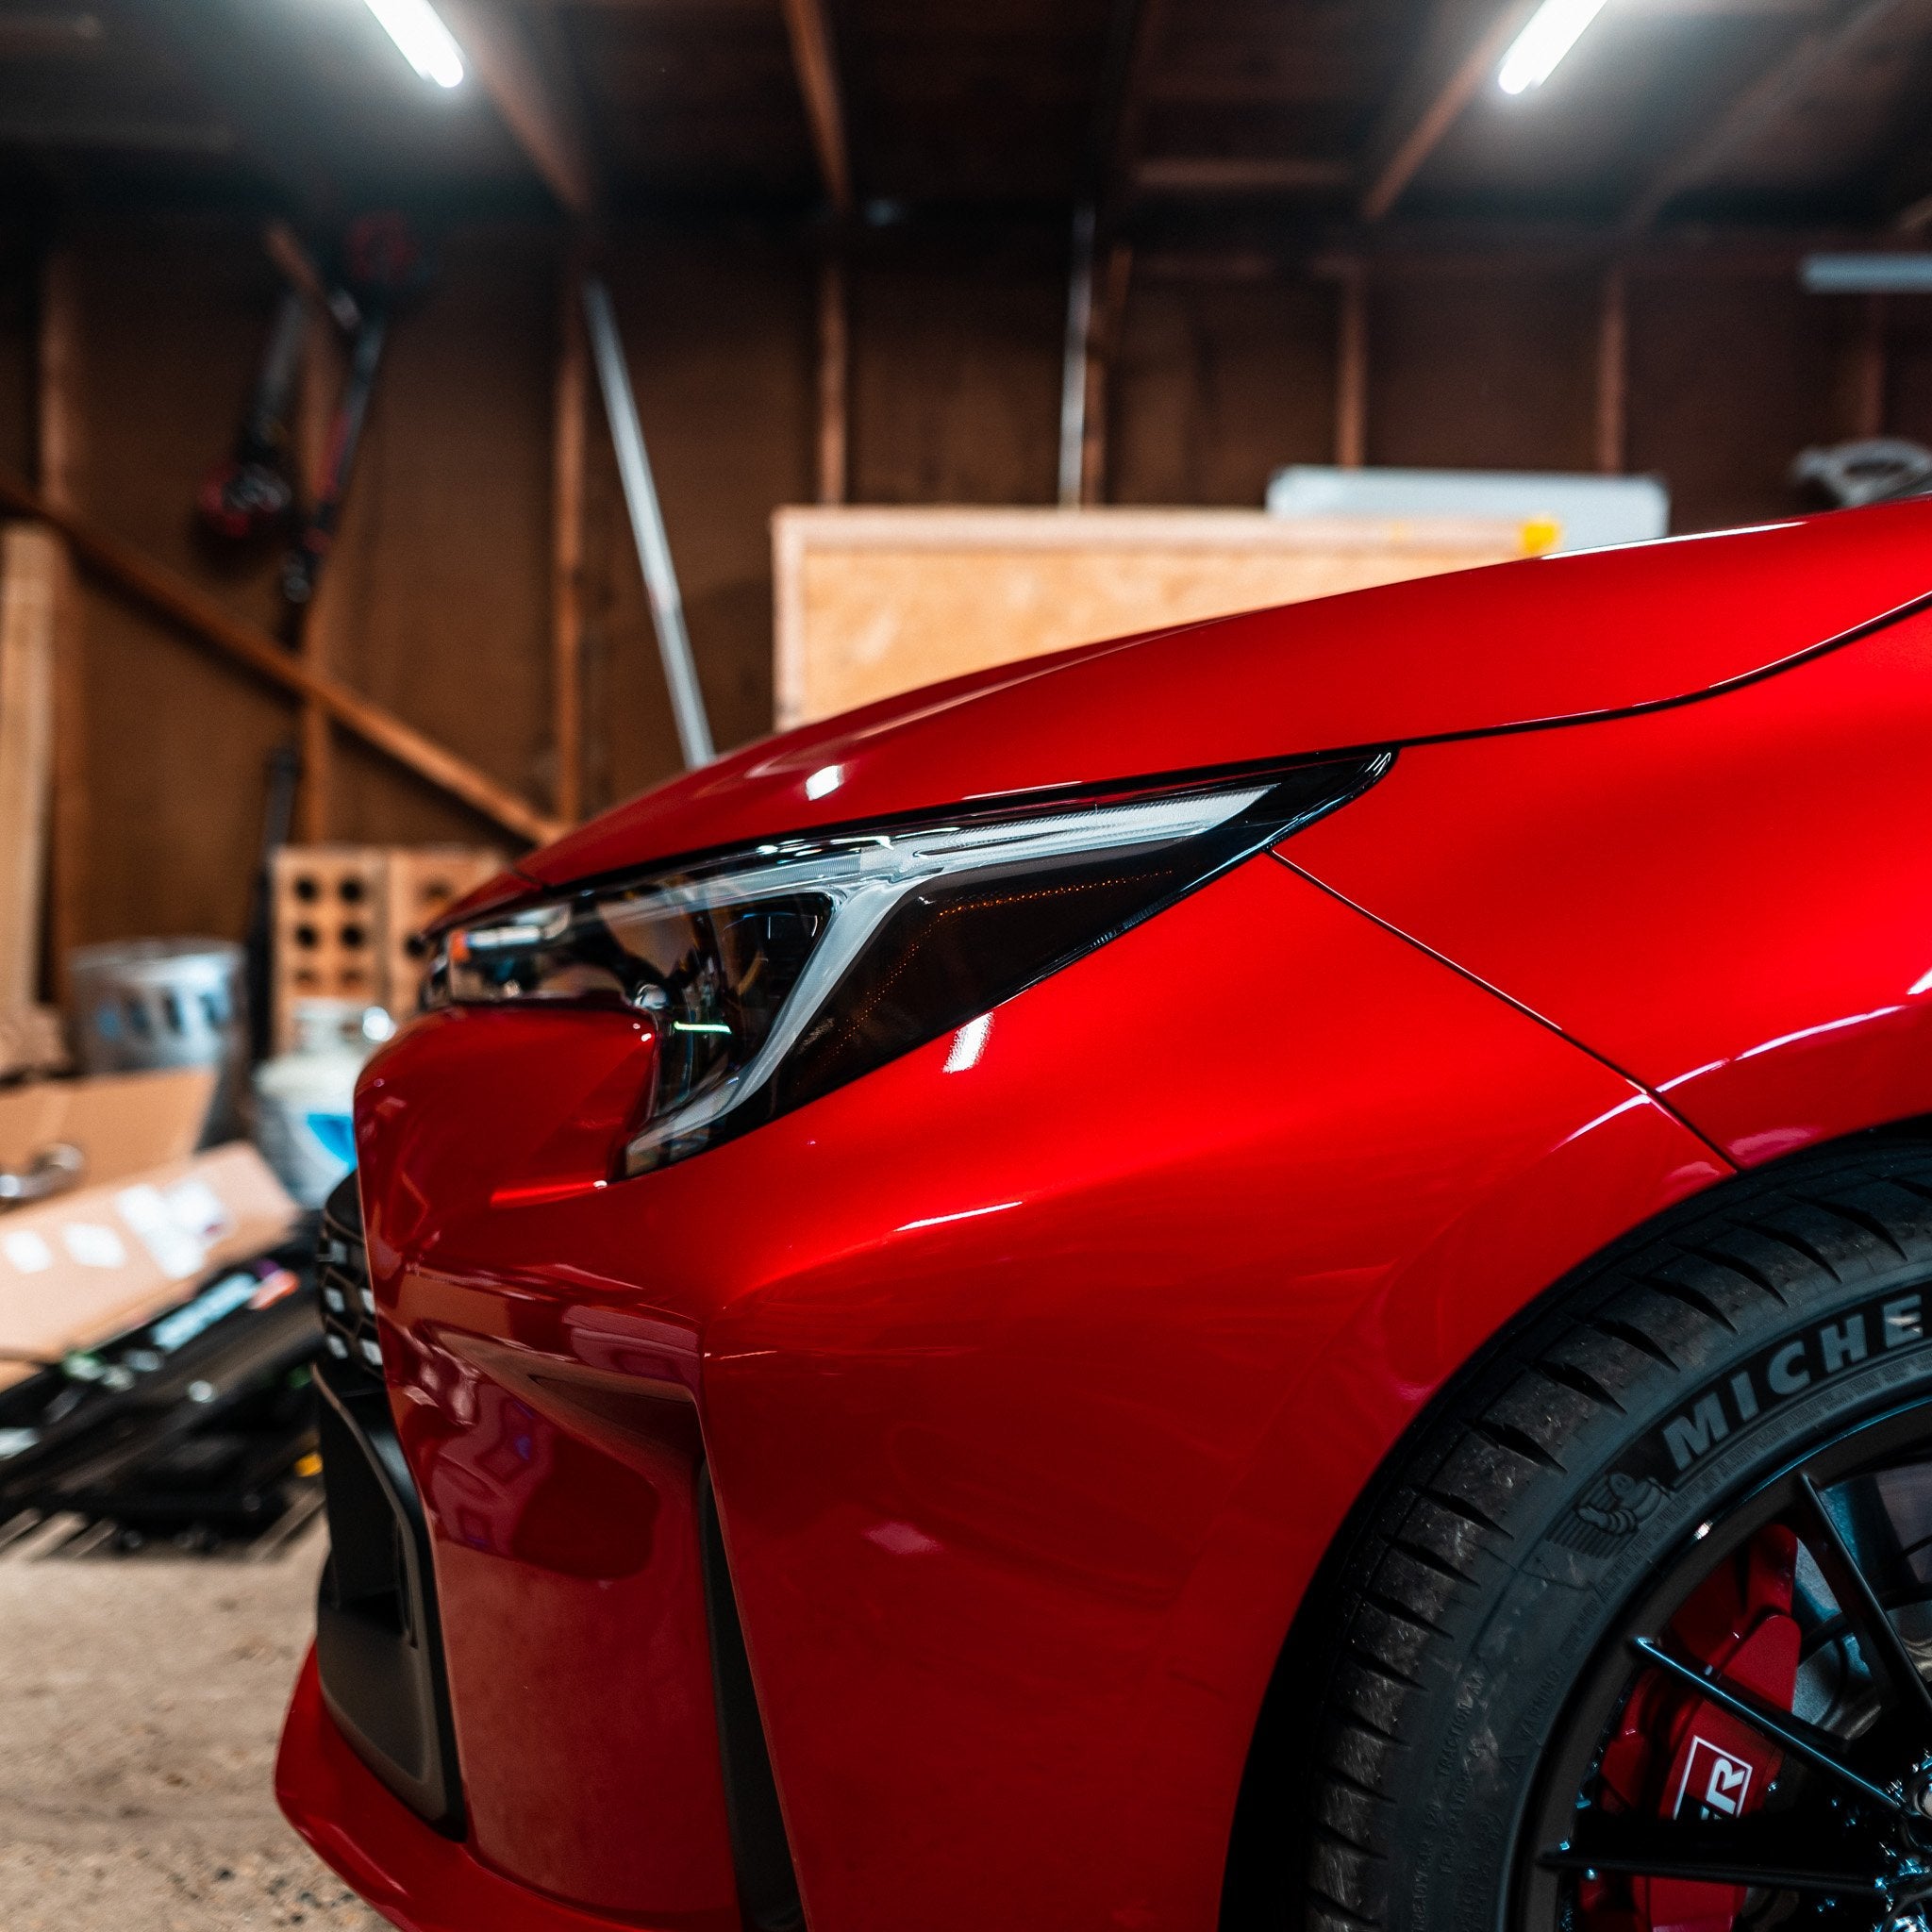
The GR Corolla headlights come with an orange sidemarker built in that sticks out like a sore thumb. These overlays allow you to mask that orange, getting rid of the eye sore, and giving the side profile of the car a much more clean and sleek appearance while still allowing the reflector to work correctly.
These overlays are designed and cut in-house using high-quality vinyl to ensure proper fit and finish.
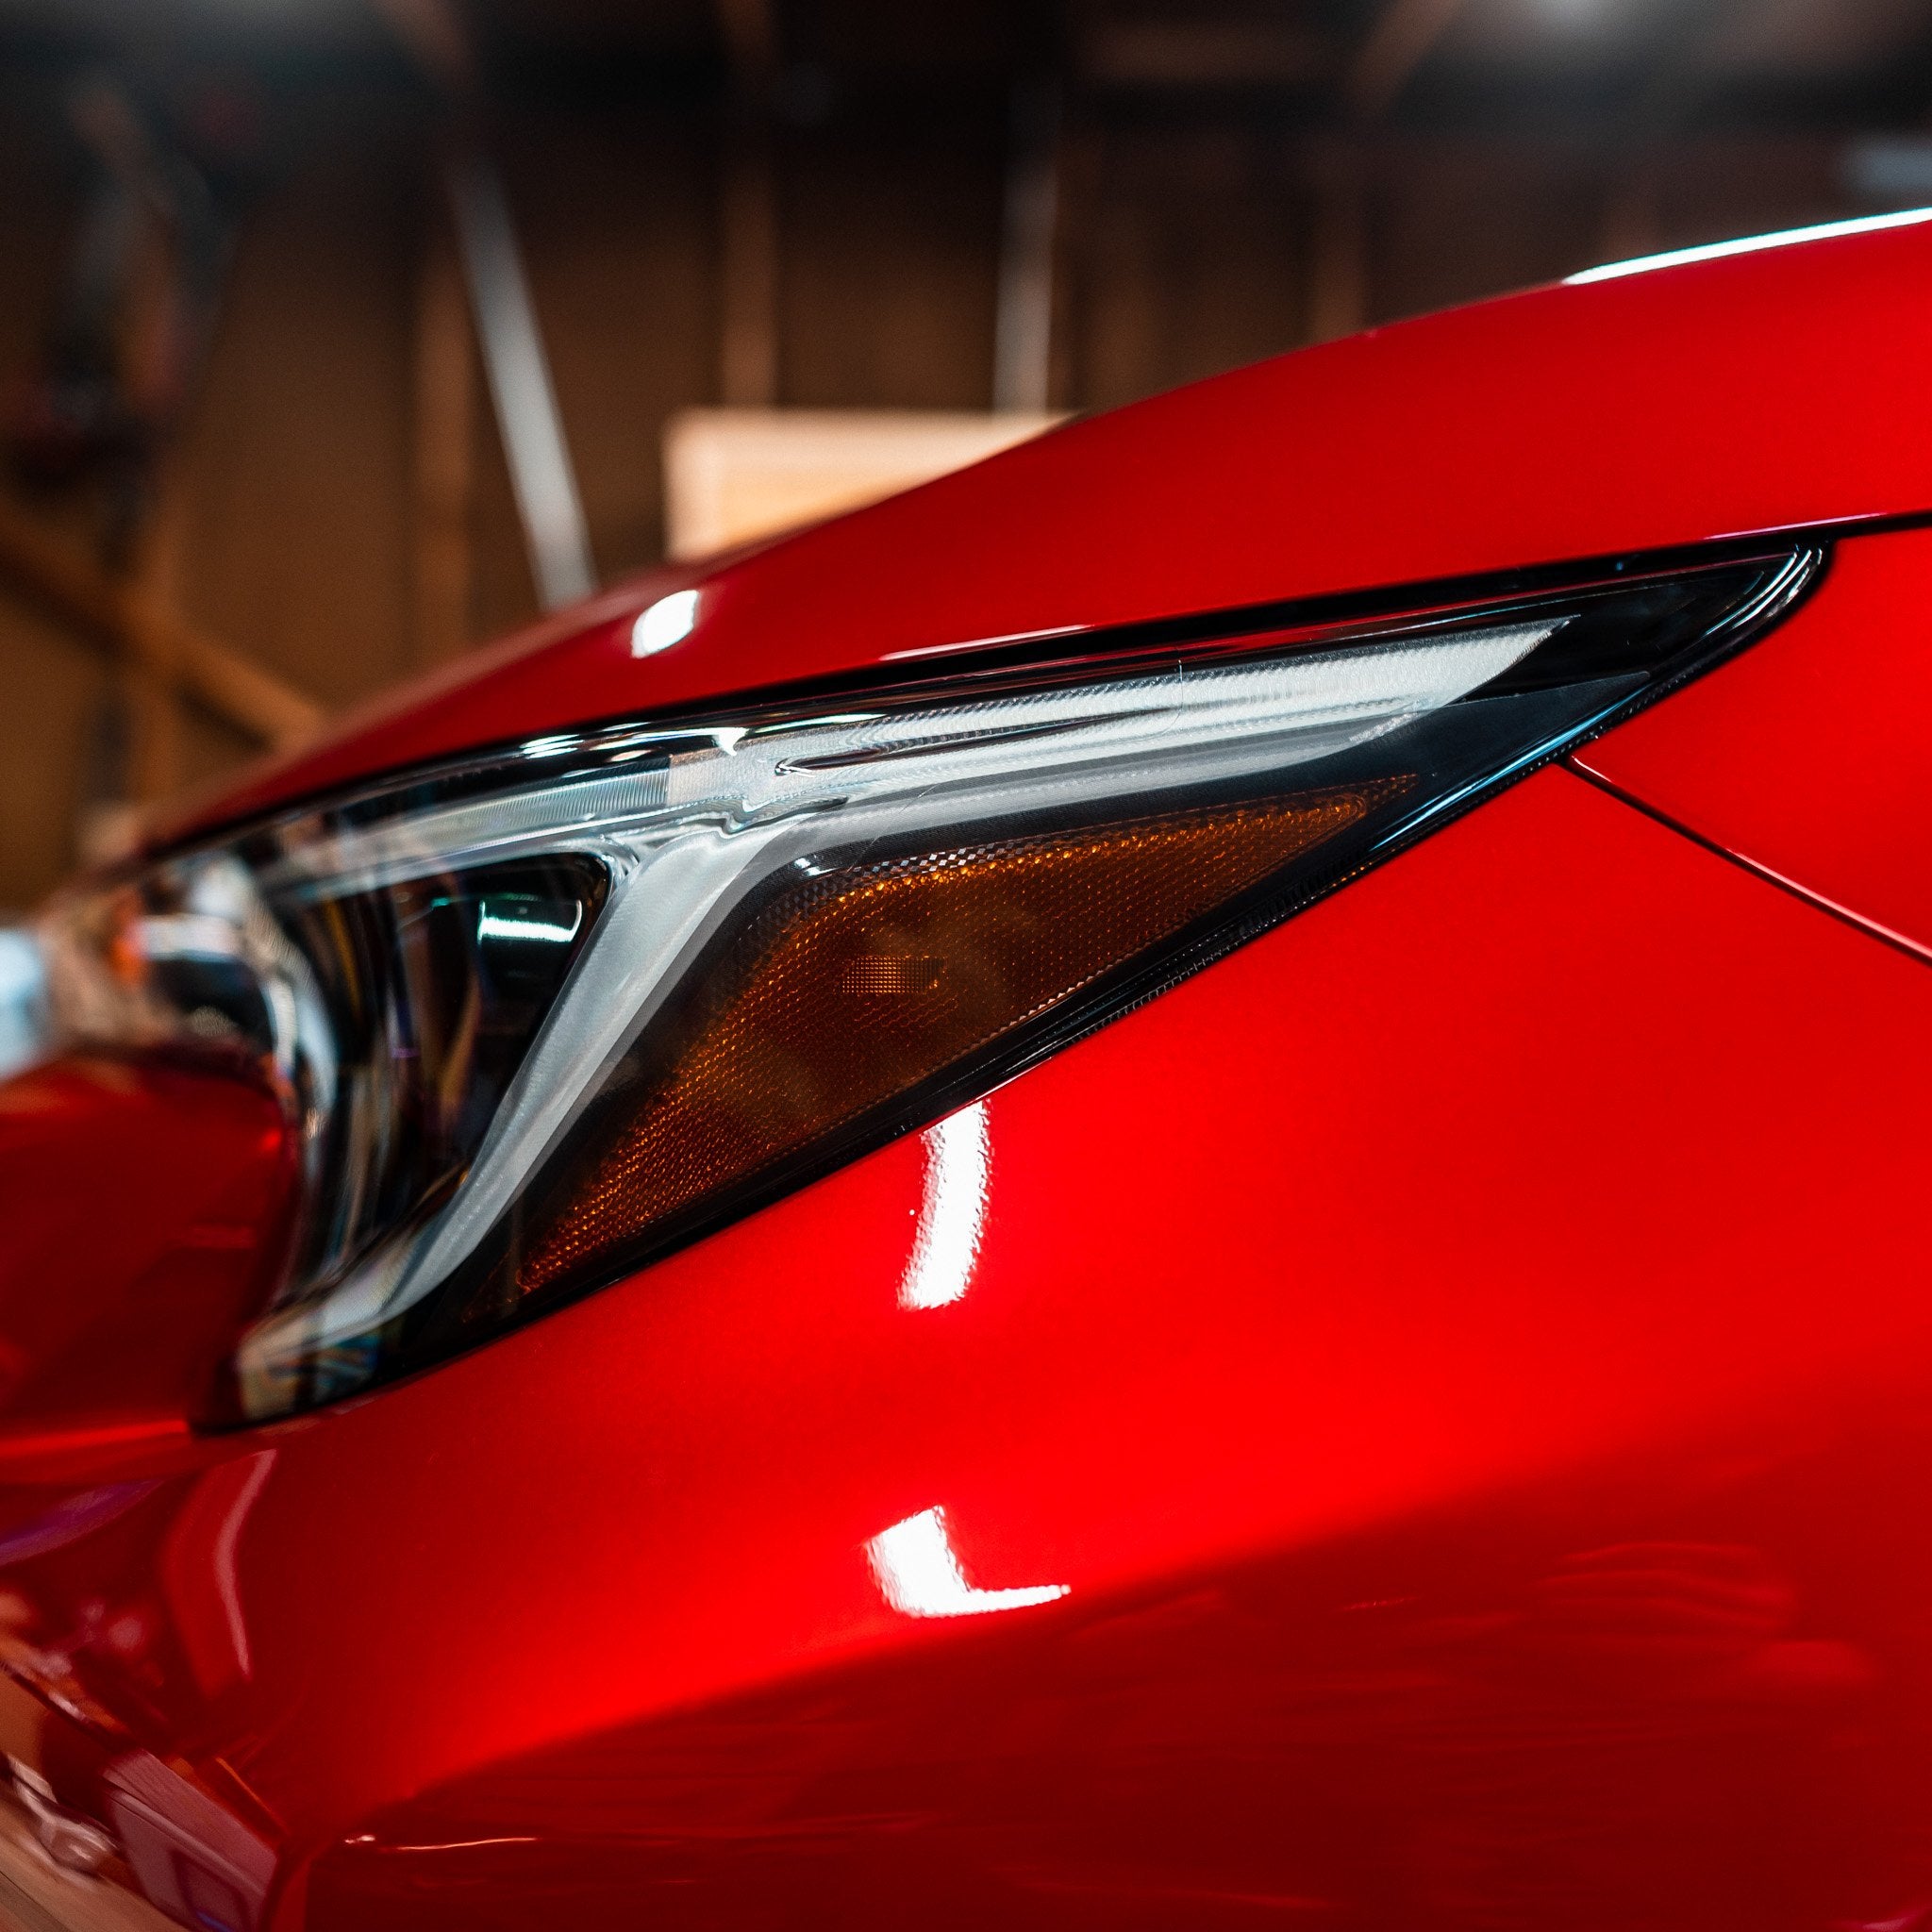
Dark Smoke
If you want to mute the orange of the sidemarker as much as possible while still maintaining the functionality of the reflector, the dark smoke option is going to be your best bet. It helps to blend the sidemarker in with the rest of the black housing to create a sleek and cohesive unit throughout the headlight.

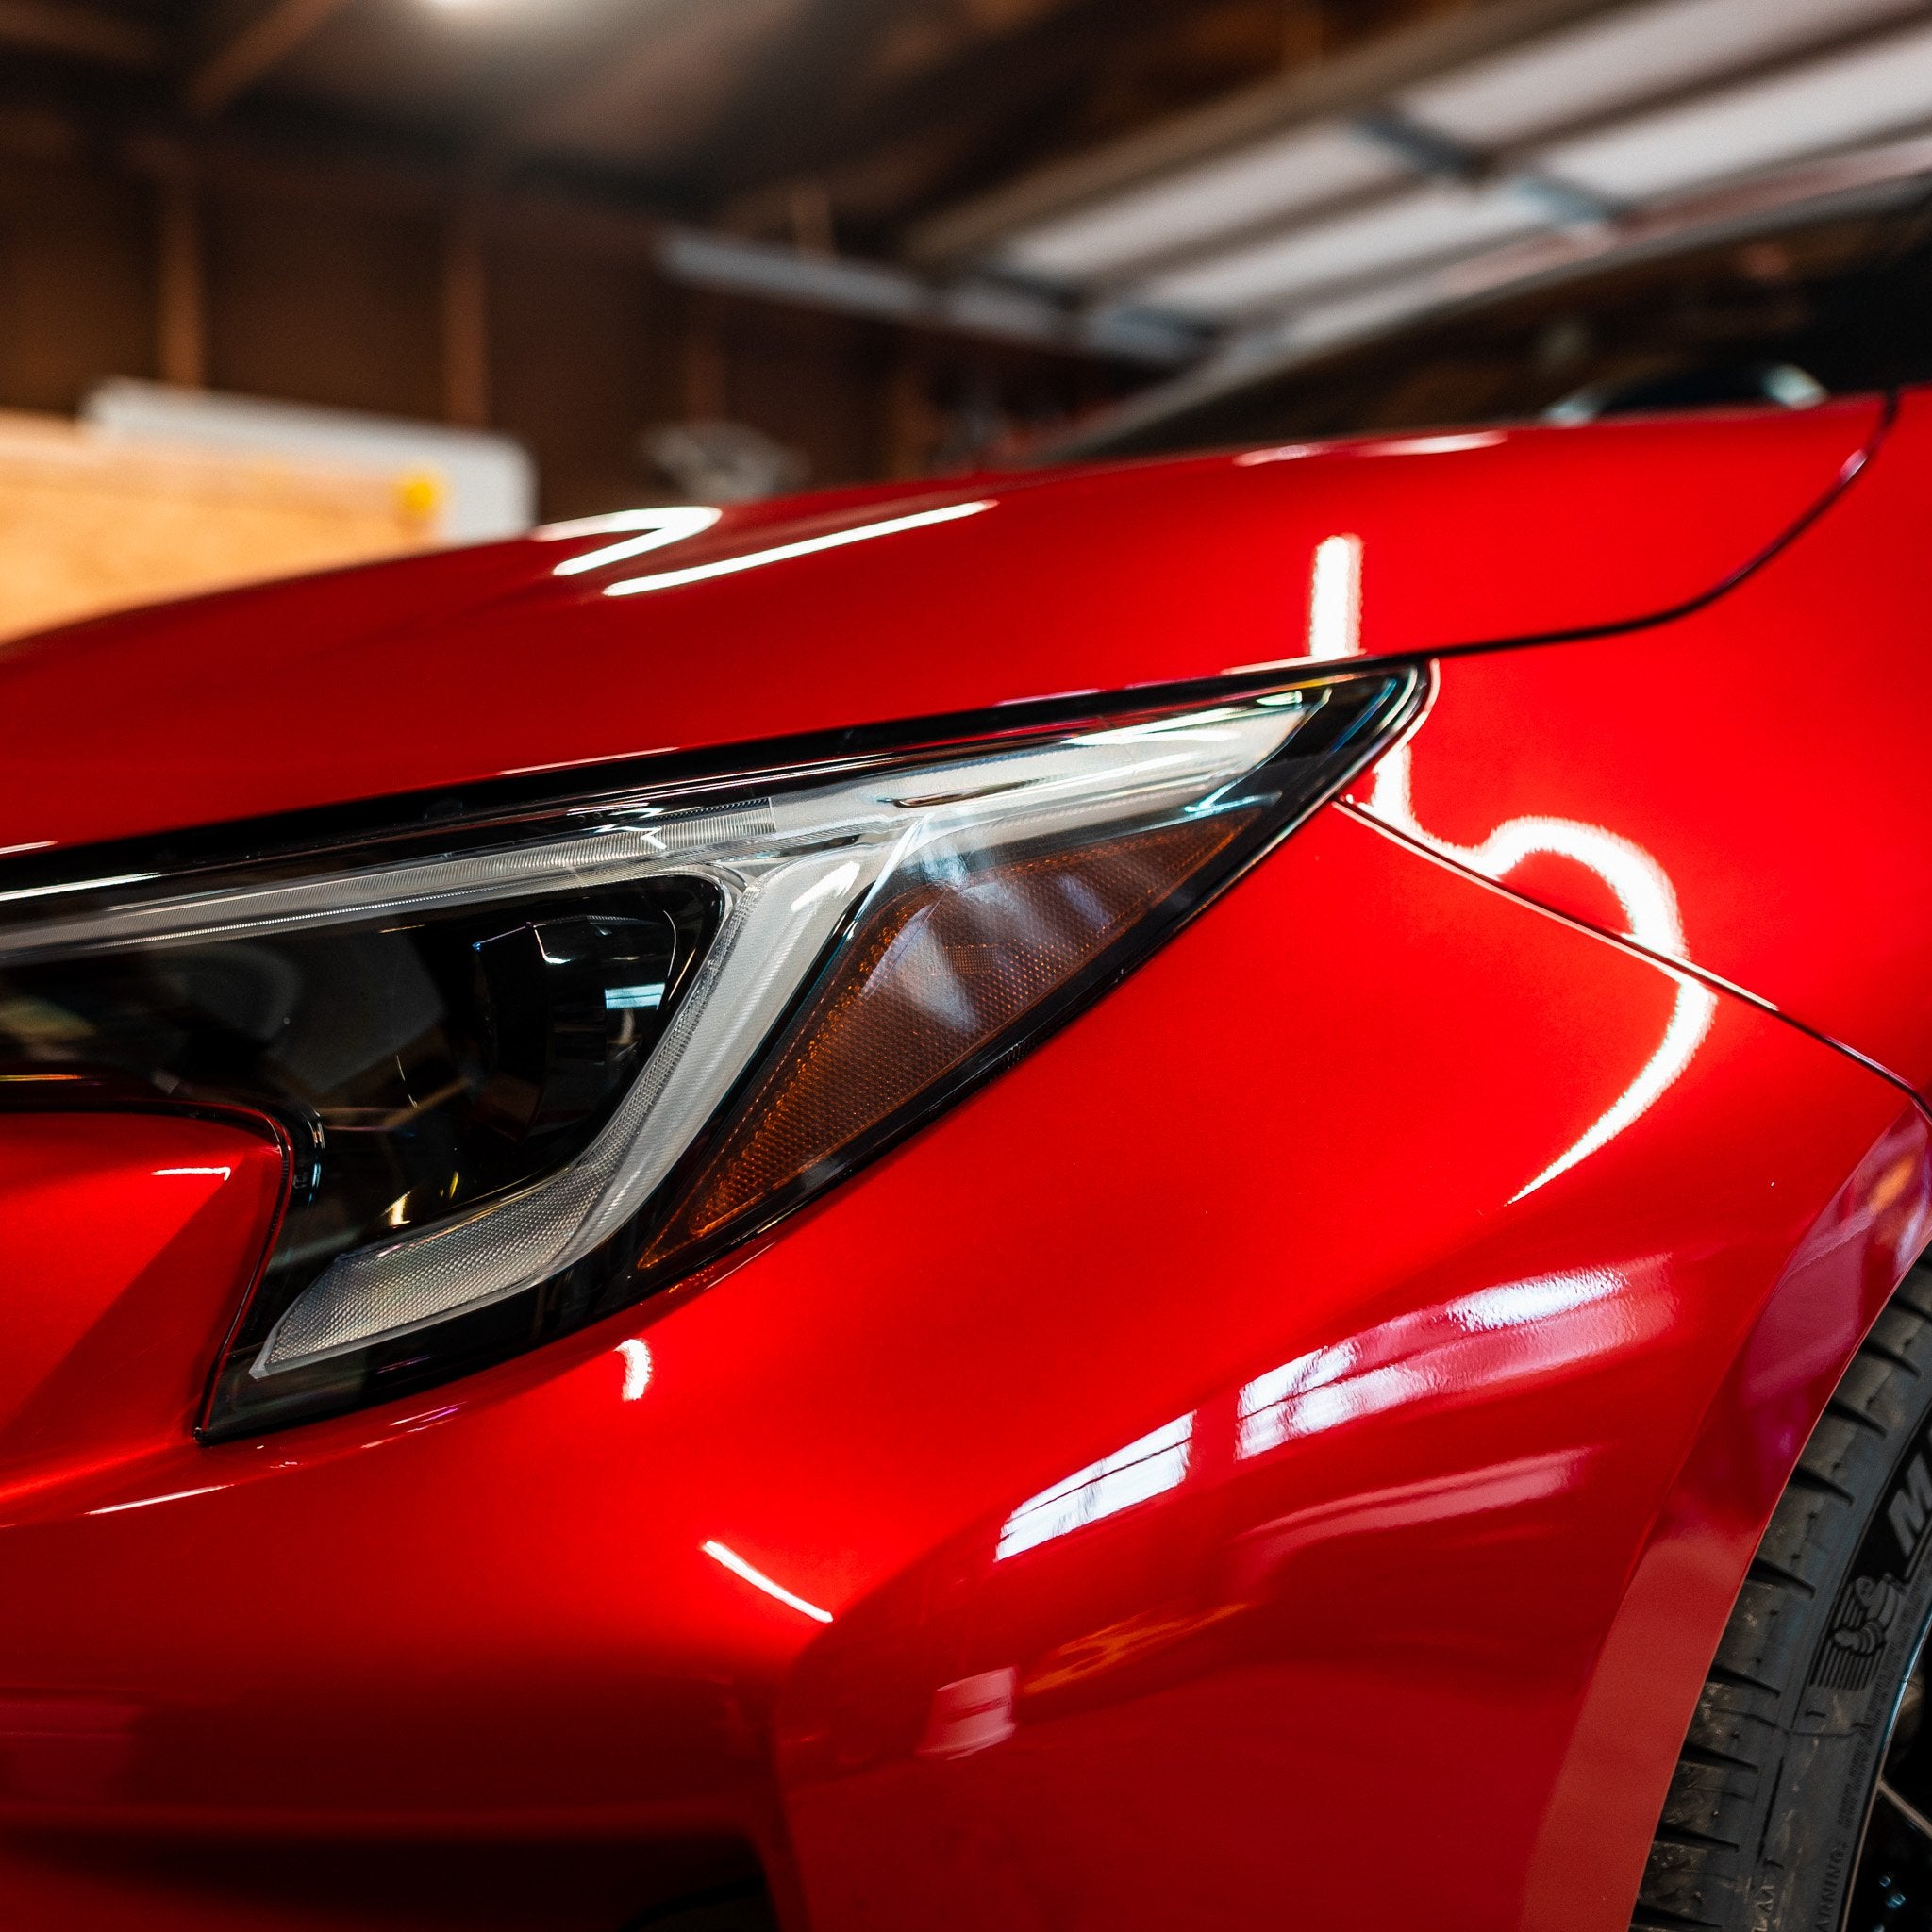
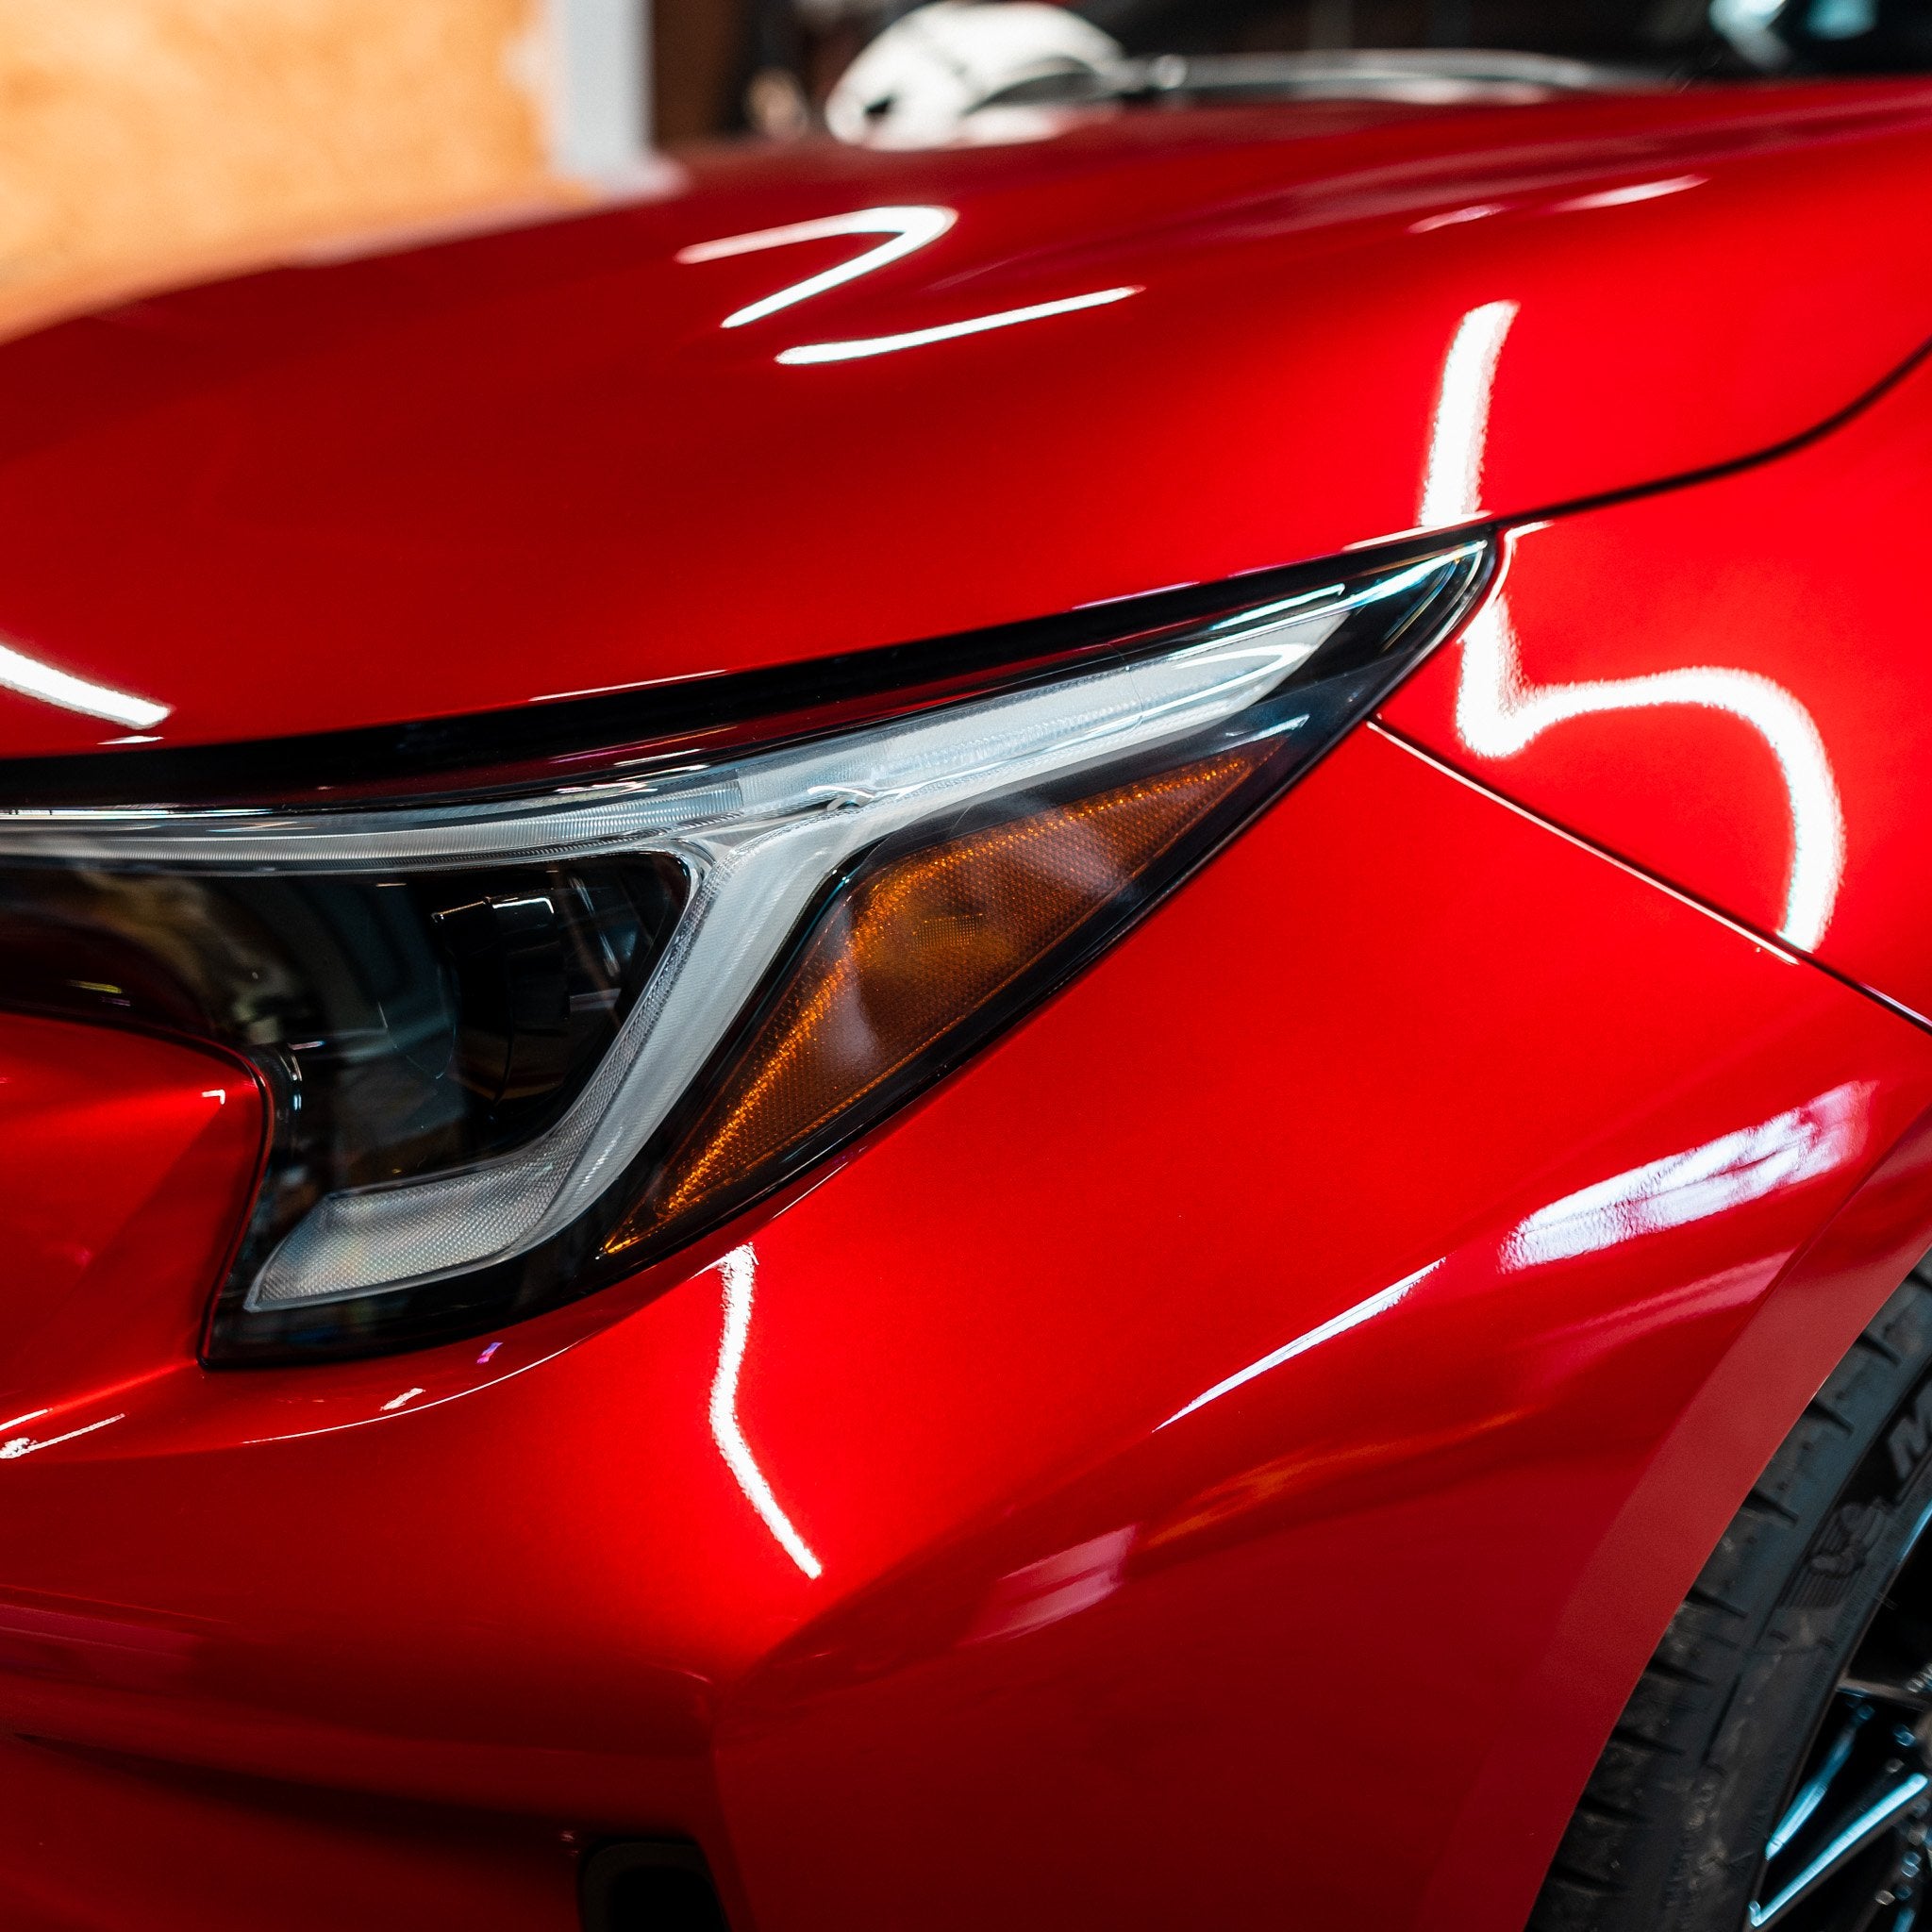
Light Smoke
If you’re just wanting to tone down the vibrant orange of the sidemarker and you’re looking for a subtle OEM+ appearance then the light smoke option is for you. You’ll still be able to see the orange hue of the sidemarker come through, but it’s not as unappealing as it would be without the overlay.

Driven.Media Install Instructions
This Product Fits
Confirmed Vehichle Fitment for 23+ GR Corolla Driven.Media Headlight Sidemarker Overlay